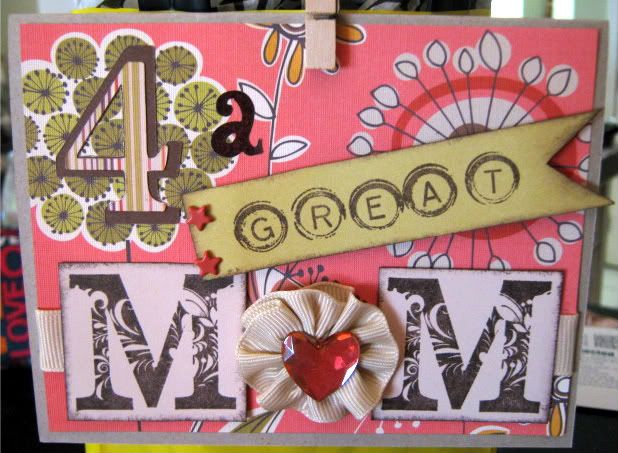
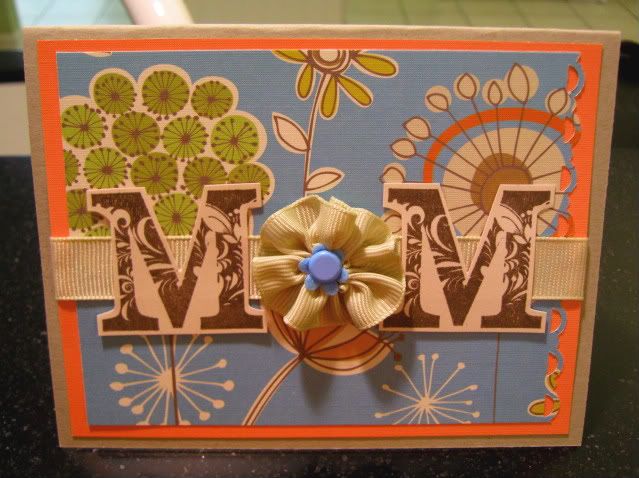
Happy New Year to you and yours! Wishing you a happy and healthy 2011, may all your dreams come true!
Friday, December 31, 2010
Wednesday, November 3, 2010
Christmas Eye Candy :)
I am addicted to all the special Christmas edition magazines that start to appear this time of year. For me they are total eye candy, and I love to gaze at them and dream and get inspired!
I was just browsing at Target in the magazine aisle for some eye candy earlier this evening and came up empty handed...boo. But, I just happened to plop down with my laptop a little bit ago and stumbled across this little gem

Amy Powers who blogs at InspireCo just posted the holiday issue of her new ezine which is called Inspired Ideas. You can view the ezine HERE. It is FABULOUS and is just chalk full of holiday eye candy!!
I would recommend getting yourself a cup of tea, or maybe hot cocoa and giving yourself plenty of time to browse this little gem. I think you'll love what you see. I sure did...now I just need a printed version of it too! ;)
I was just browsing at Target in the magazine aisle for some eye candy earlier this evening and came up empty handed...boo. But, I just happened to plop down with my laptop a little bit ago and stumbled across this little gem

Amy Powers who blogs at InspireCo just posted the holiday issue of her new ezine which is called Inspired Ideas. You can view the ezine HERE. It is FABULOUS and is just chalk full of holiday eye candy!!
I would recommend getting yourself a cup of tea, or maybe hot cocoa and giving yourself plenty of time to browse this little gem. I think you'll love what you see. I sure did...now I just need a printed version of it too! ;)
Monday, October 25, 2010
Boo 4 Me!
Recently my Hubby and I made a trip up North to do some house hunting. We knew it would be a very fast paced trip, as we would only be in town for about 24 hours.
That being said, my son decided he would rather stay home. So lucky for us, my parents offered to come down and stay with him while we were gone. My son was thrilled of course and they had a blast and he got all the love and spoiling that only grandparents can give! :)
But, when I arrived home I had the greatest surprise waiting for me! My Mom and Son made me an adorable Halloween art piece that I just LOVE!!!

It is made with felt and is stretched over wooden stretcher bars. My Son cut out all the letters and hand stitched it as well. It is so perfect for me and fits beautifully over our stove. I am so grateful to my Mom for working on this with him!!
That being said, my son decided he would rather stay home. So lucky for us, my parents offered to come down and stay with him while we were gone. My son was thrilled of course and they had a blast and he got all the love and spoiling that only grandparents can give! :)
But, when I arrived home I had the greatest surprise waiting for me! My Mom and Son made me an adorable Halloween art piece that I just LOVE!!!

It is made with felt and is stretched over wooden stretcher bars. My Son cut out all the letters and hand stitched it as well. It is so perfect for me and fits beautifully over our stove. I am so grateful to my Mom for working on this with him!!
Friday, October 15, 2010
Philly Favors
I love to make favors, for parties or as little gifts, surprises, or tokens etc. I just need an excuse and I am ready. So when my hubby started talking about the meeting he is hosting in Philadelphia and needing something to welcome each person attending, my mind smiled.

I decided to make candy bar sleeves, and picked Hershey bars in honor of Pennsylvania and went patriotic, Liberty Bell with my decor.

The great thing about these sleeves is when you pull the knotted ribbon, your candy bar slips right out. Super easy, super cute, and there are endless ways to decorate them.

My hubby also wrote a short welcome letter that I printed on parchment paper and wrapped around each candy bar before inserting them into the sleeve. I added some extra "Thank You" sleeves for him to give out, because when you host a big event you always feel grateful for any help you receive.
I had so much fun making these!! I plan to make them for Halloween as well as favors for my son's teachers and friends.
I found a wonderful blog You Can Stamp It! that has a great tutorial for making candy bar sleeves...you can find it HERE. What can I say, I'm too lazy to type the directions out myself ;) forgive me :) please :)

I decided to make candy bar sleeves, and picked Hershey bars in honor of Pennsylvania and went patriotic, Liberty Bell with my decor.

The great thing about these sleeves is when you pull the knotted ribbon, your candy bar slips right out. Super easy, super cute, and there are endless ways to decorate them.

My hubby also wrote a short welcome letter that I printed on parchment paper and wrapped around each candy bar before inserting them into the sleeve. I added some extra "Thank You" sleeves for him to give out, because when you host a big event you always feel grateful for any help you receive.
I had so much fun making these!! I plan to make them for Halloween as well as favors for my son's teachers and friends.
I found a wonderful blog You Can Stamp It! that has a great tutorial for making candy bar sleeves...you can find it HERE. What can I say, I'm too lazy to type the directions out myself ;) forgive me :) please :)
Wednesday, October 13, 2010
Sweet Fall Owl Wreath
My Mom sent me a link a few weeks back of an owl wreath she saw on the web. She knew I would love it, and she was right!! I saved a copy of the picture because I was soooo inspired to make my own. This is the inspiration wreath:

Look at that adorable owl!!
I cannot find the website it came from, my Mom thinks it was HGTV.com but I have been over that site with no luck. I thought it was from CountryLiving.com, no luck there either. Well, it's out there somewhere...sorry I can tell you where.
I hunted at Michael's for a sweet little owl, not much to choose from. But I found one I liked enough so off I went!
Here is my wreath:

Now for a closeup of my sweet little owl.

I love looking at this wreath everyday, sure makes me smile!

Look at that adorable owl!!
I cannot find the website it came from, my Mom thinks it was HGTV.com but I have been over that site with no luck. I thought it was from CountryLiving.com, no luck there either. Well, it's out there somewhere...sorry I can tell you where.
I hunted at Michael's for a sweet little owl, not much to choose from. But I found one I liked enough so off I went!
Here is my wreath:

Now for a closeup of my sweet little owl.

I love looking at this wreath everyday, sure makes me smile!
Saturday, September 11, 2010
Ruffle Obsessed
I have been on a major ruffle kick lately...putting ruffles on everything I sew! There has been so much craziness in our lives lately, and much more to come, but my sewing has been a huge escape for me. When the craziness began, I decided I wasn't going to do any sewing until everything was settled. Okay, that lasted about one month. I couldn't stay away!! I guess sewing is just such a huge part of me that it can't be separated. :)
Of course the actual things I have been sewing are not things that I need...so I listed them in my poor, neglected Etsy shop. It had been so long since I had listed anything, some of the format had changed so I felt like I was completely new at it. :)
Here are some pics of my latest creations, I am really trying to improve my photos, taken with my cheapo camera.


In other sewing news, I am participating in a Sew-a-long on StacySews blog using Amy Butler's new book Style Stitches. Of course, the bag I chose to make has ruffles!! Big shocker there! It's called the Miss Maven, and here is a pic of it from the book:

I'll show you the fabrics I have chosen once I get my act together. It uses 2 sided fusible Peltex which I have never used before. I almost bought some on Ebay thinking I would never find any in my dinky town, but guess what?? The Walmart had it for $3.50 a yard!! Saved about $10 right there, yippee!
Okay ruffles, here I come!
Of course the actual things I have been sewing are not things that I need...so I listed them in my poor, neglected Etsy shop. It had been so long since I had listed anything, some of the format had changed so I felt like I was completely new at it. :)
Here are some pics of my latest creations, I am really trying to improve my photos, taken with my cheapo camera.


In other sewing news, I am participating in a Sew-a-long on StacySews blog using Amy Butler's new book Style Stitches. Of course, the bag I chose to make has ruffles!! Big shocker there! It's called the Miss Maven, and here is a pic of it from the book:

I'll show you the fabrics I have chosen once I get my act together. It uses 2 sided fusible Peltex which I have never used before. I almost bought some on Ebay thinking I would never find any in my dinky town, but guess what?? The Walmart had it for $3.50 a yard!! Saved about $10 right there, yippee!
Okay ruffles, here I come!
Sunday, May 9, 2010
Happy Momma's Day!!
Friday, May 7, 2010
Feeling Very Appreciative
We have been blessed with so many wonderful teachers the 4 years my son has been in school. Teacher Appreciation Week is a great way for me to show how grateful we are for all they do for our son. Plus it gives me even more reasons to sew and craft!! =)
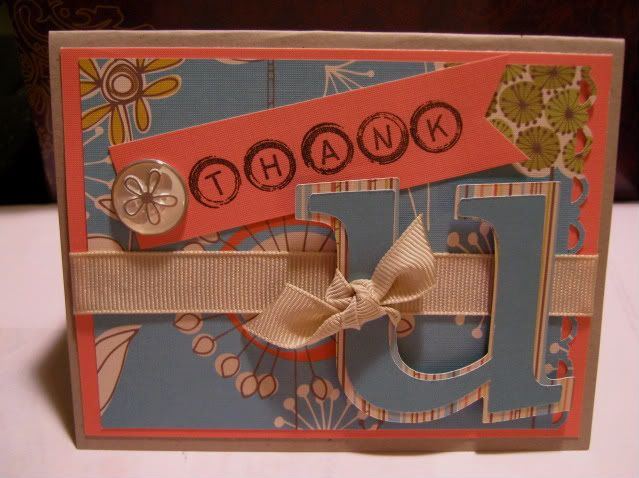
I made a card and new bag for my son's homeroom teacher.
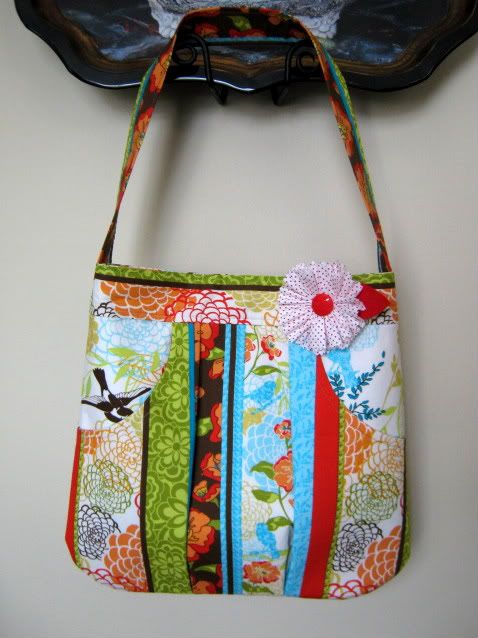
She was thrilled with the bag. It is a great design, I bought the pattern from may & mae on Etsy. It's called the March Bag and you can find the listing HERE.
Then I made some supply boxes to hold all the little necessities teachers need, INCLUDING chocolate.
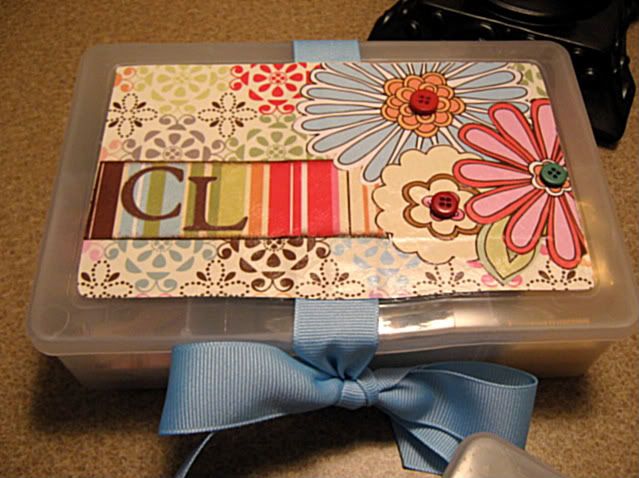
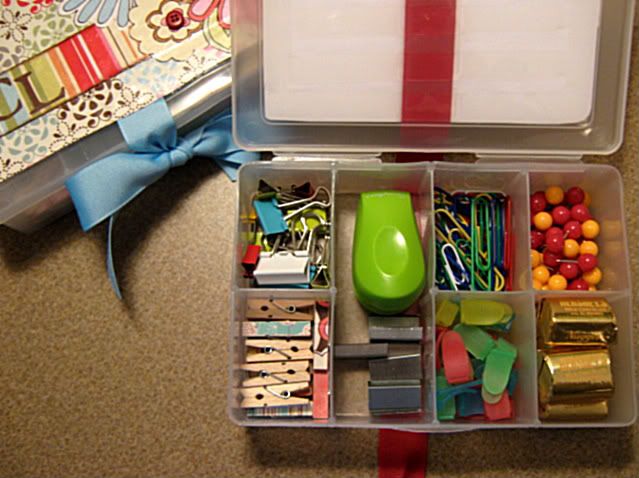
I even found mini staplers that use regular size staples! I was inspired to make these from a great tutorial found HERE, such a fantastic idea.
I bought the smaller version of the storage box she used which had 7 compartments instead of 17. Both size storage containers can be found at Walmart. I added a coat of gloss Modge Podge on the top of mine to seal and protect it.
My son also has a number of other teachers and Teaching Assistants that he works with so I wanted to make something special for them too.
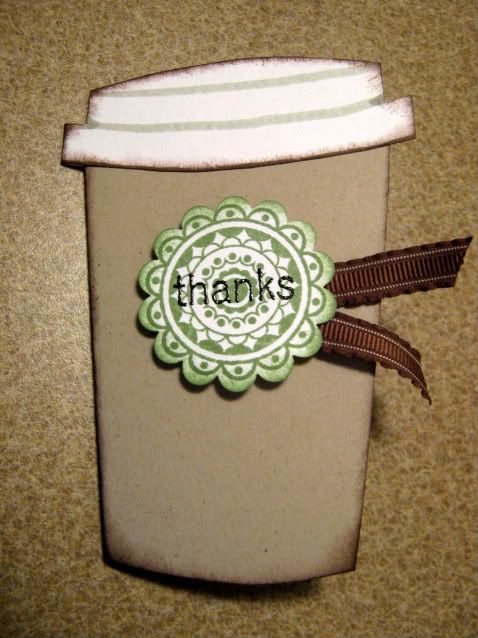
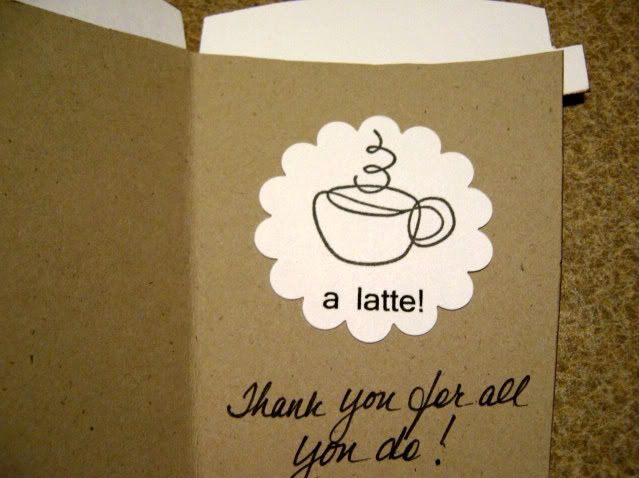
I designed a Starbucks themed card, to go with the Starbucks gift cards we planned to give them.
Exterior:
Interior:
Then I made little fabric fold over wallets to hold the gift cards.
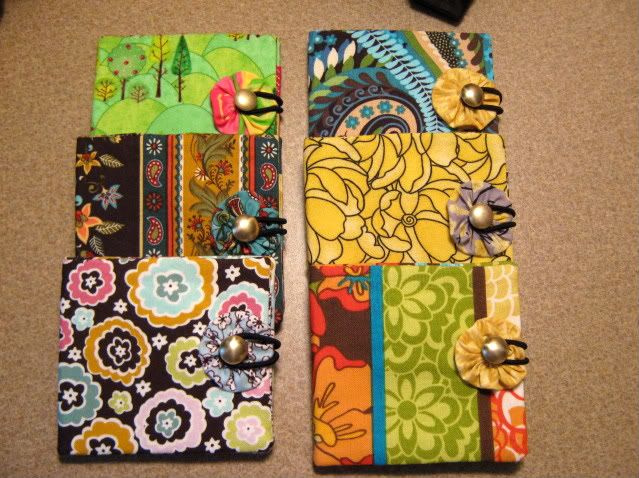
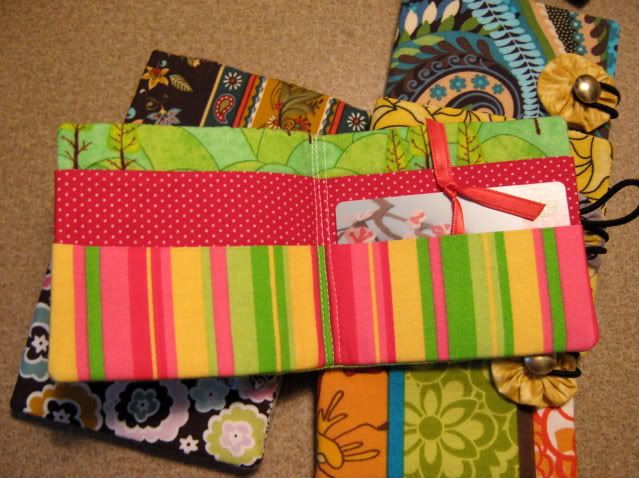
These were a lot of fun to make and really a great way to use and combine scrap fabrics.
Sure hope all they feel all the appreciation we have for them! Ahhh now I can relax... well maybe for a little while?
I made a card and new bag for my son's homeroom teacher.


She was thrilled with the bag. It is a great design, I bought the pattern from may & mae on Etsy. It's called the March Bag and you can find the listing HERE.
Then I made some supply boxes to hold all the little necessities teachers need, INCLUDING chocolate.


I even found mini staplers that use regular size staples! I was inspired to make these from a great tutorial found HERE, such a fantastic idea.
I bought the smaller version of the storage box she used which had 7 compartments instead of 17. Both size storage containers can be found at Walmart. I added a coat of gloss Modge Podge on the top of mine to seal and protect it.
My son also has a number of other teachers and Teaching Assistants that he works with so I wanted to make something special for them too.
I designed a Starbucks themed card, to go with the Starbucks gift cards we planned to give them.
Exterior:

Interior:

Then I made little fabric fold over wallets to hold the gift cards.


These were a lot of fun to make and really a great way to use and combine scrap fabrics.
Sure hope all they feel all the appreciation we have for them! Ahhh now I can relax... well maybe for a little while?
Sunday, April 4, 2010
Happy Easter Images


Have been having a wonderful time Easter decorating, crafting, gifting and landscaping! It has been so beautiful here in Florida this weekend, and it really feels like spring, and a time for rebirth and new beginnings!
Hope you are having a fantastic Easter weekend as well! xo
p.s. the tutorial for the adorable fabric carrots can be found at www.shinyhappyworld.com
Wednesday, March 3, 2010
Sweet Pea
My Bunco group had a surprise baby shower for one of our players last week, so I had fun making some baby themed goodies!
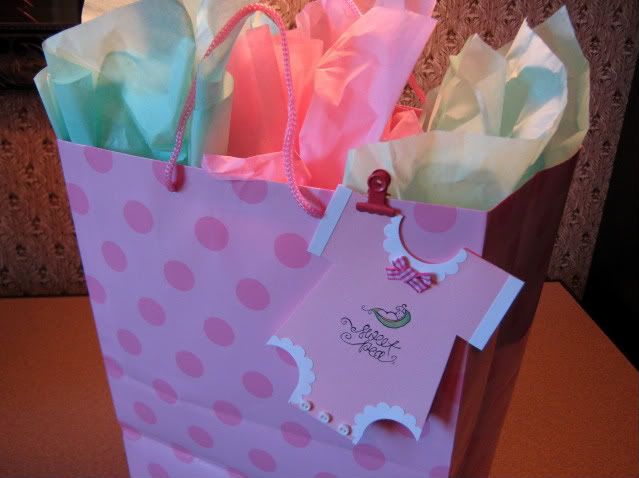
I think I my have had as much fun making the little onesie card as I did the actual gift!
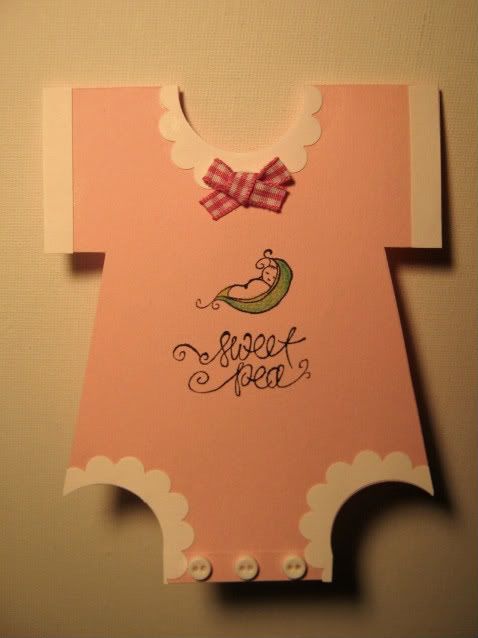
The sweet pea stamp is adorable, and it actually came from the $1 bin at Mike's a while back. The stamp was rectangle shape and too long for the card, so I just colored the words on the stamp with a Stampin Up marker and stamped that first. Then I cleaned the stamp, colored the baby portion with the markers and stamped that above the words. I used color pencils to shade the pea pod.
Directions for a onesie card can be found HERE =)
When debating about what to make for her gift, I thought about all the cute clutches I have seen lately. I figured why not make a diaper clutch? That way when you don't need to carry the big diaper bag, you can grab the clutch and have wipes and dipes handy when needed.
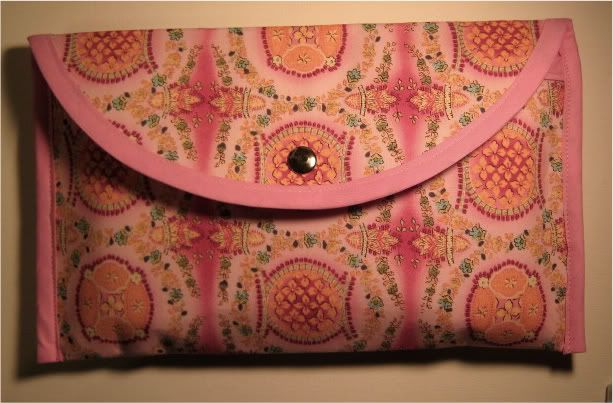
She's having a girl, so I went with pink! It is just big enough to hold a wipes case and a few diapers.
I was a little nervous about the gift because I don't really know the Mommy to be that well, but she really liked it so I was thrilled =)

I think I my have had as much fun making the little onesie card as I did the actual gift!

The sweet pea stamp is adorable, and it actually came from the $1 bin at Mike's a while back. The stamp was rectangle shape and too long for the card, so I just colored the words on the stamp with a Stampin Up marker and stamped that first. Then I cleaned the stamp, colored the baby portion with the markers and stamped that above the words. I used color pencils to shade the pea pod.
Directions for a onesie card can be found HERE =)
When debating about what to make for her gift, I thought about all the cute clutches I have seen lately. I figured why not make a diaper clutch? That way when you don't need to carry the big diaper bag, you can grab the clutch and have wipes and dipes handy when needed.

She's having a girl, so I went with pink! It is just big enough to hold a wipes case and a few diapers.
I was a little nervous about the gift because I don't really know the Mommy to be that well, but she really liked it so I was thrilled =)
Sunday, February 14, 2010
Happy Valentine's Day!
Nothing says Happy Valentine's Day than a cute little chunk of plush cheese, right??
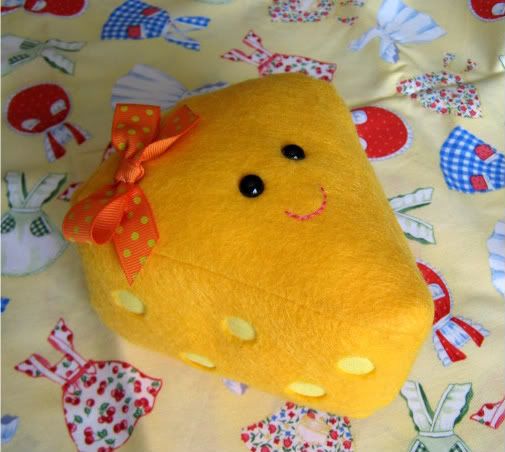
Well, maybe not for you...but it is for a great girl I know. Her sister's Valentine's request was a stick of butter, because she LOVES butter...
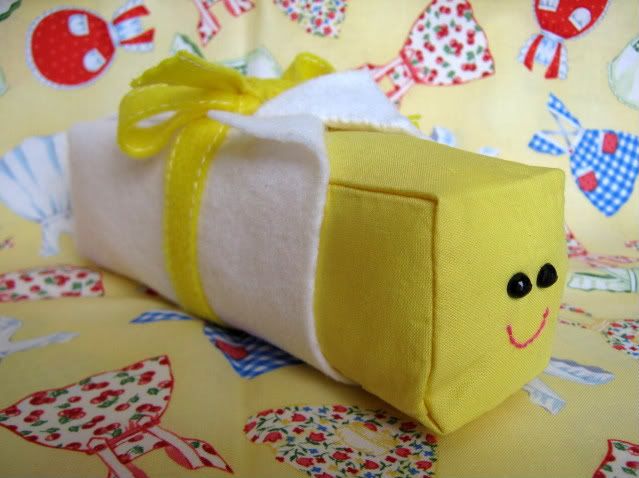
She even had a dream that I made her a stick of butter, and I am happy to report that it lived up to her expectations =)
I also made some more box bags, these are so handy and really can hold a lot because of their shape.
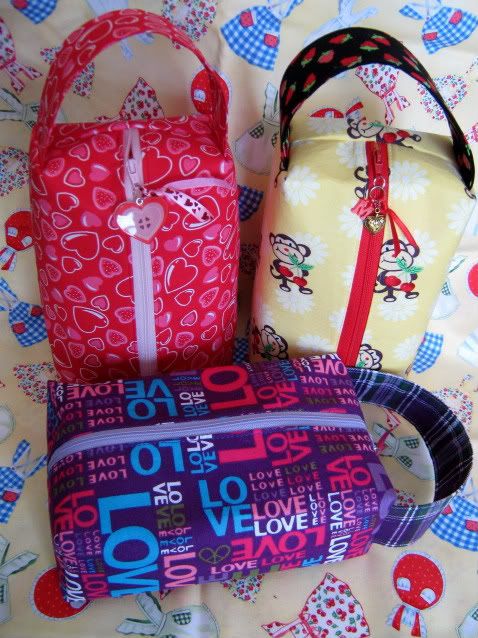
If you'd like to give the box bag a try, my friend Stacy at Stacy Sews has the perfect tutorial you can find HERE.
And last but not least I FINALLY was able to make the Swaroski crystal hearts that Martha featured last year.
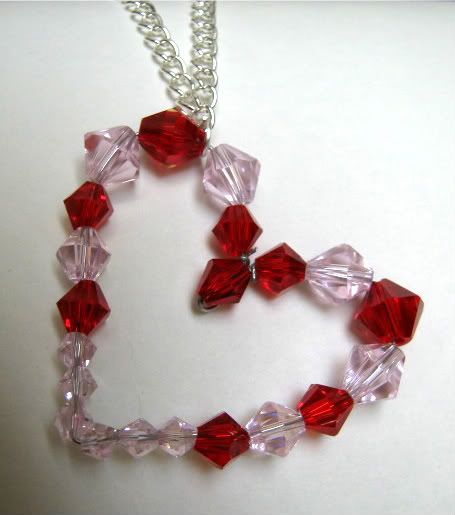
I had to modify her directions a little because I do not have the budget Martha obviously has for Swaroski crystals! LOL But I think they turned out beautiful anyway.
You could uses a variety of beads or crystals to make these, as long as you have small sizes for the bottom point.
Hope you all have had an awesome day, xoxo

Well, maybe not for you...but it is for a great girl I know. Her sister's Valentine's request was a stick of butter, because she LOVES butter...

She even had a dream that I made her a stick of butter, and I am happy to report that it lived up to her expectations =)
I also made some more box bags, these are so handy and really can hold a lot because of their shape.

If you'd like to give the box bag a try, my friend Stacy at Stacy Sews has the perfect tutorial you can find HERE.
And last but not least I FINALLY was able to make the Swaroski crystal hearts that Martha featured last year.

I had to modify her directions a little because I do not have the budget Martha obviously has for Swaroski crystals! LOL But I think they turned out beautiful anyway.
You could uses a variety of beads or crystals to make these, as long as you have small sizes for the bottom point.
Hope you all have had an awesome day, xoxo
Friday, February 12, 2010
Love Notes
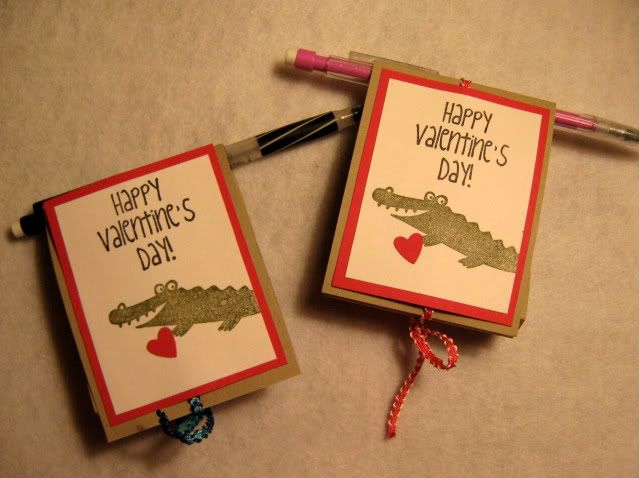
Today is the day for my son to exchange Valentines at school! I used to love this day when I was little =) I think he could take it or leave it. Oh well, he still wanted me to make handmade Valentines for him and use a gator theme, so that was alright with me.
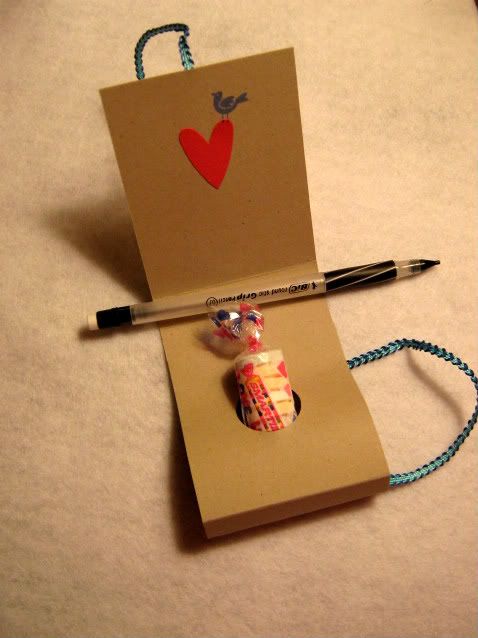
I made a simple folded card that could hold a JUMBO roll of Smarties, and a last minute addition of a mechanical pencil. Because according to my son, everyone likes mechanical pencils! Duh...
Here is the front:
And the inside:
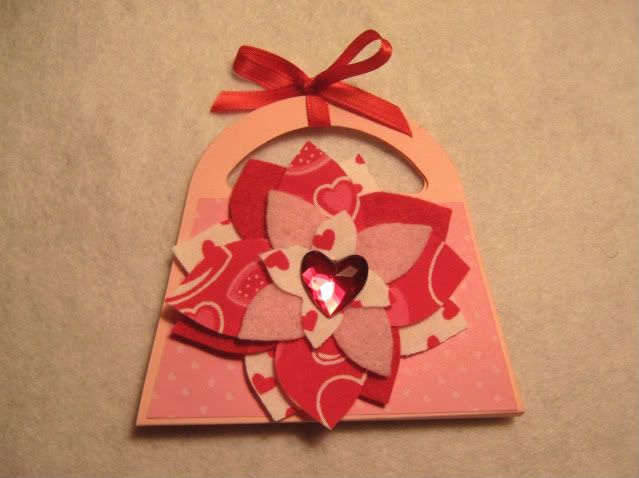
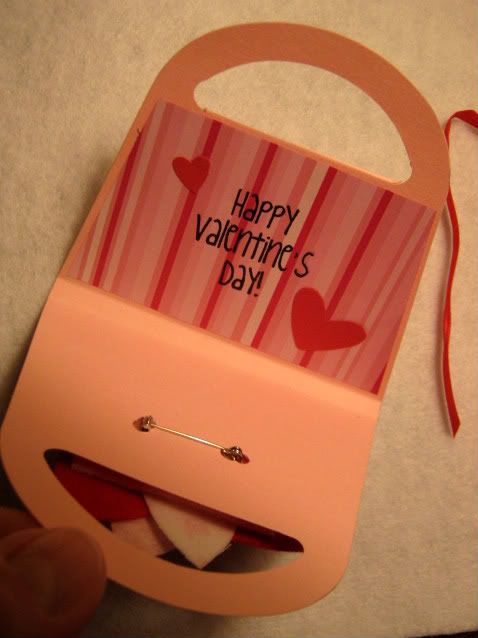
But of course I couldn't stop there...I made some Valentines for my friends and family and my son's teachers. I have been doing a lot of crafting lately with my new Big Shot and having so much fun! I decide to do a little purse shaped card with a flower brooch on the front that they can remove and pin on their sweater, jacket or bag =)
Front:
Inside:
Brooch:

The Brooch is made of interfaced fabric and felt, that I cut out using the Big Shot and a flower die, stacked them and added a faceted heart scrapbooking brad and added a pin back to the back. Super simple!
Hopefully everyone receiving these handmade Valentines will be feeling the love! XOXO
I have more Valentines goodies to show, but some are still under construction...gotta get busy!
Sorry about the dark pictures, but it is a cold, gloomy, rainy day here in the sunshine state =( But hey, at least there isn't snow!
I made a simple folded card that could hold a JUMBO roll of Smarties, and a last minute addition of a mechanical pencil. Because according to my son, everyone likes mechanical pencils! Duh...
Here is the front:

And the inside:

But of course I couldn't stop there...I made some Valentines for my friends and family and my son's teachers. I have been doing a lot of crafting lately with my new Big Shot and having so much fun! I decide to do a little purse shaped card with a flower brooch on the front that they can remove and pin on their sweater, jacket or bag =)
Front:

Inside:

Brooch:

The Brooch is made of interfaced fabric and felt, that I cut out using the Big Shot and a flower die, stacked them and added a faceted heart scrapbooking brad and added a pin back to the back. Super simple!
Hopefully everyone receiving these handmade Valentines will be feeling the love! XOXO
I have more Valentines goodies to show, but some are still under construction...gotta get busy!
Sorry about the dark pictures, but it is a cold, gloomy, rainy day here in the sunshine state =( But hey, at least there isn't snow!
Subscribe to:
Comments (Atom)

